Remember the Before....it's starting to look better. If you want to refer back to part 1 click here.
I need to remember to take pictures. I had already put two coats of Primer on and waited a couple of days before I started to paint. I started with my painting and remembered I needed to take pictures of the primed paint job. (I will give all the information of products I used below).
I had started painting and it was already turned over and I couldn't turn it over again because of the wet paint. But above is the primed portion.
Primed drawer
I wanted to add some color, so I spray painted the inside of the drawer after I primed and before I painted.
Above: This has been primed twice and painted once. I got a little paint on the stained top portion and I will go over what I did if you keep reading!
The painted drawer.
Close up of the paint on the stained top. I need to be better about touching already done surfaces with my hands for support while I paint.
Not the best picture, but this is after I sanded the painted areas on the top and the sides where the tape didn't do so great of a job.
After I sanded the top, I re-stained. I didn't worry about getting on the white paint because I had a baby wipe handy. I simple wiped it off.
The wiped clean edge.
What I used
Stain:
Min Wax Dark Walnut Stain

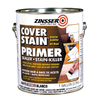
Primer:
Zinsser Oil Primer

Paint:
Rust-Oleum Oil Gloss White
Spray Paint for Drawer:
Krylon Island Splash

Of course you will need Paint brushes and for the oil a paint thinner to clean the brushes if you want to keep them.
Part 3 The finished product will be coming soon!!!


No comments:
Post a Comment