Tuesday, January 29, 2013

Little Girl Skirt

I wanted to make my daughters a new skirt. I think the hardest part for me is picking out the material. I went back and forth. I am still not 100% certain I like the two colors together and my daughter who is 5 going on 18 told me she didn't like the brown. Oh well!! Here is the size 4/5 it might last until she is six. Fabric: Any cotton Fabric Amount: I bought 1 yard of each with the intention of making more. Top portion: Length 28 inches ~ Width 5 inches Middle: Length 44 inches ~ Width 8 inches Bottom: Length 44 inches ~ Width 6 inches Elastic: One inch thick and 20 inches in length
Cut out the material. Then if you have a serger (which I don't) serg along the border of all the material. If you are like me, sew a zig zag stitch around. Now the next part gets a little tricky and I am not sure the best way to explain this.
Take your top layer and create a waste band. Use your elastic to determine how wide it should be. Mark with two pins where the opening should be to thread your elastic in.
Thread elastic and pull out the other end. Match the two elastics together on top of each other and sew elastic together.
Sew your bottom and middle pieces together.
Take the bottom and middle piece that is now one and you will gather the top of the middle piece. Put your sewing machine on straight stitch. There should be a place on your sewing machine to loosen or tighten your thread. You want to loosen it all the way (at least that is what I do on my machine, but my machine is 20 years old). As you sew the material will gather on its own.
Now pin your middle piece together to your top piece, pattern side facing each other. You may need to loosen the gather on the middle piece to match the top piece of material. Once you have them matched together and pinned sew them together.
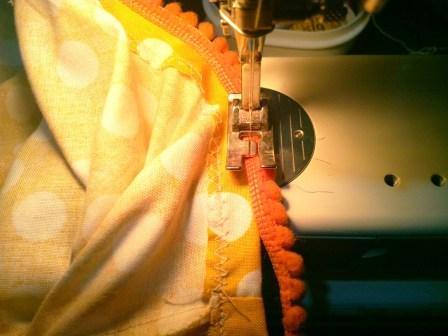
To finish up, measure a 1/2 inch (more or less), hem, iron, pin then sew. I found cute small pom pom from Pick Your Plum (a website that sells random craft items each day). You could use ric rac or any other item you think is cute. Or just leave it as is!
I am still trying to find the best way to describe my sewing projects. If something doesn't make sense, please feel free to leave a comment. I will try and describe it better if needed. Keep checking back, as I will be posting a matching skirt for a 6-9 month old soon. :)

Monday, January 28, 2013

Window Shopping

I found these great old windows a couple of years ago. They needed a lot of work. I bought about 12 of them for $30. It was a great deal. I fixed them all up and only kept two (how many windows does one need in addition to the actual ones you can see out of?)!! The process was long and ugly at times. I did this several years ago, so I don't have any pictures of the process. Some of the glass was loose and needed to be fixed. I used some commercial caulk to solve that problem. They all needed to be sanded and repainted. The window pictured above is used as a chore chart. It has been used for hanging kids artwork, and during the holidays writing our service or acts of love/kindness board. There is really no limit to what you can use it for. My sister-in-law uses hers as a calendar. I made several others that I nailed little clothes pins to the top and middle portion of the wood to hang pictures from. THE HOW TO: After all the dirty work was done(i.e.: washing, sanding and making sure the glass was okay), I painted the wood cream. I found tissue paper with a cream background and the red print and mod podged it on. Finally I put a sealer on it. I love how this one turned out. I will have to create another project just to show you how simple it is to mod podge tissue paper onto something!

Friday, January 25, 2013

Baby Blessing Dress

When I went shopping for a blessing dress for my youngest, I was shocked by the price tag. There were some darling dresses, but I guess I couldn't pay $50 + dollars for a dress my daughter would wear once. I went searching online for ideas and came across this darling little ruffle dress with a free pattern. It is a simple sewing project. I wanted to share what I made and the original blog that the pattern came from. Click Here to get the pattern/instructions.
I bought one yard of fabric at Hobby Lobby using a 40% off discount coupon. In addition I also got the elastic, some white shoes, a white flower and headband. I think it all cost around $10. What a great deal. I can stomach that cost! When sewing with the ruffle fabric it can be tricky. Make sure that the ruffles are always lined up. I didn't use elastic in the arms of the blessing dress. It didn't need it. I also cut the length of the material longer then the peasant dress pattern. I thought it was appropriate for a blessing dress.
I will show a tutorial soon on how to make the head band it is very simple!

Monday, January 21, 2013

YO YO Tutorial

Time to make your yo yo's!!! Gather any material you want. The more the merrier. Try to find both pattern and solid material. I take the lid of a 16 oz yogurt container. Place it on the material and start tracing with a marker around the lid. I would use a light color marker on light material, and then when you hem the yo yo, you will not see the marker.
Depending on the size of lid or circle will obviously determine the size of the yo yo. The flower pattern is the size of all my yo-yo's in the projects already posted and that is using the lid described above.
When cutting out the circles, they do not have to be perfect. Mine are a little rough as I usually double up material to make the cutting go faster.
Thread your needle with regular sewing thread. Tie a knot on one end and take your circle, pattern side not facing you and bend down a little of the material to begin the hem around the whole circle.
Continue the hem around the whole circle. Pulling the string tighter and gathering the material as you go.
When you have gone around the circle, pull your thread tight and then put it through the center of the yo yo and pull it out the other end.
Tie a knot on the flat side of the yo yo and you are done with the first one.
You need many Yo Yo's to complete a project. Don't get discouraged doing them. I usually will cut material and then when watching a movie or TV, sit and sew the yo yo's.

Friday, January 18, 2013

Yo Yo Table Runner

With the hundreds of Yo Yo's I made, one of the projects was a table runner. I don't put it out much because of three kids under 5. I'm sure as they get older I will have it out more regularly.
My favorite thing about this is the material. I used my Mom's scraps. The material is 30 years old mixed with some more modern stuff.
Next week I will plan on giving a tutorial on making yo-yo's. Not sure if anyone is interested, but I thought I would post it anyway!

Wednesday, January 16, 2013

Lemon Love Notes

Lemon Love-Notes, I love how this sounds. My husband grew up with these, aka lemon bars. This phrase encompasses two things I enjoy. Lemon bars and love notes!! This week I had a disastrous experience making lemon bars (so if any of you have a great recipe send it my way). But I will always enjoy love notes. It doesn't even need to be a love note, I love notes, letters or cards. You name it, if it is sent to me in the mail or dropped of on my door and addressed to me, I get excited!! One of my favorite love note stories come from Richard G. Scott. He tells of when he took 100 little paper punch circle and on one side numbered them 1-100 and on the other side wrote his wife a message with a word on each circle. He gathered them up and put them in an envelope and gave them to her. How sweet. The time and effort it took for him to do this is wonderful. He later found the note glued in her journal. That being said, I will be posting some ideas for note cards. Valentines is coming soon and why not send some great letters, cards or notes to friends and dear ones.
Instructions: Take any type of material. I like felt, it is thicker material. Cut out your design. Next take your note card or any type of paper and place the material on the card. You could glue it first if you wanted so it will not move. I have never done that. I set my stitch to zig zag and start sewing the material onto the card. Sewing paper will dull your needle. You may want to have a separate or older sewing needle for this. Happy note sending!!

Saturday, January 12, 2013

Subway Art

I love these fun sayings. I created these a couple of years ago and haven't done much with them. Why not share. I ask if you use them, please do not sell them, they took a lot of time to make. I am still working on the best way to use this blog. These were originally word docs and I have changed them so that blogger will upload them. If you want the actual document leave your email. It would be great if you also subscribed to my blog!! Even better I have a bunch more that I will post! Keep checking back to get them all!

Friday, January 11, 2013

Yo Yo Wreath

Years ago as a teenager, my sister and I started making yo yo's. Goal: to make a quilt. Well this never happened for me, my sister finished and the quilt is beautiful. I had all these left over yo yo's. So first craft post: what I used my Yo Yo's for.
I love wreaths, and I love this yo yo wreath. I can use it any time of the year! (I am just starting this blog, so if you are interested in getting instructions, I am more then happy to. Until requested, I am just going to post the craft idea).

And it Begins

I have gone back and forth for years on if I should blog about the crafts and projects I do. I decided that it is time to start. I am no writer. I enjoy creating and making things for my kids and home. As of today, my goal is to post once a week with a craft that I have done. I find that making things is what helps define me. So here goes!