Thursday, March 28, 2013

Paper Flower Wreath

My New Spring Wreath!

Material you need:

1. Styrofoam wreath
 2. Scrap material to wrap wreath (optional)
3. Old magazine (I used 3-4 small Magazines)
4. Sizzors
5. Glue gun or Craft Glue
6. Spray paint
7. Ribbon of some sort to hang with


I wanted a new spring wreath.  What I thought would take an hour surprised me to take several more.  But I REALLY like the result. 


I wrapped the wreath with scrap material. 
 I like gluing onto the material rather then straight onto the styrofoam.


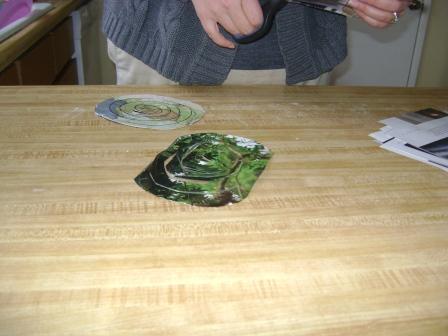
I then ripped out the pages of the magazine and cut them in half and then in half again. My magazine was a small one.  


I bunched them in sets if 2, 3,4, etc.   I didn't count I just grouped them and cut.  The more pages together, the larger your flower can become.  

 I cut them into oval/circle shapes.   For better pictures I drew the  circle on the papers.  I didn't do this on all of my circles.  Then the cutting began again.  This process happened several times, as I realized I would need more magazines to complete my wreath. 


My circles were not cut perfectly, they had jagged edges and were not all that pretty, but I like the way it turned out.  Some flowers were larger then others and all were different. 


I started wrapping with the outer edge.  I tried it both ways and I preferred working from the outside in. 


Start wrapping tightly.  When I got near the end I would rip off the last little bit if it didn't fit well.  


You can glue them on the wreath or get a little pile and then glue.  When you let go they will not be as tight.  I did both.  Glue the tight ones right on and put them down and let them grow a bit.  


Once your flowers are all glued, you can spray paint it.   I took my wreath outside and spray painted it several times, giving it time in between to dry.   I bought my spray paint at Walmart the cheap stuff for $1.  

Now if you have a door that faces East and it gets REALLY hot between the screen and door, don't use a glue gun.  The heat will melt the glue!!!  Trust me not fun to see parts of your wreath on the ground and glue that melted and then hardened dripped all over your door!  This might become a Christmas wreath!

Have fun and Enjoy!


Tuesday, March 26, 2013

Kids Hoodie Towel Tutioral

My Kids LOVE their Hoodie Towels!!
They got theirs as baby shower gifts and have used them for years. 
My niece is having a girl and I thought I would make her baby one.

What you need: 
1 regular towel
1 hand towel
Material for ruffle edge (My kids have ribbon sewn 1/4 of they way up on the hand towel) . I decided I wanted a ruffle edge. I bought my towels at Target and had the purple material on hand. 


I actually had it all sewn before I figured out that I needed to cut the hand towel down.  Oops.  I should have taken pictures, but I was a bit frustrated and the baby shower was in 1 hour.  To say the least I was in a bit of a hurry.
Cut the hand towel to equal 12 inches on one side and 8 on the other.  I then zig zaged the edge or you could serge it.  If you want to hem maybe leave a little more material. 

Sew the 12 in side together. 

Do you see the hoodie taking shape?

I took my purple material.  I made it about 1 1/2 inch wide .  It was about 16 inches long.  If you don't want it very ruffly then shorten your length. 
I don't have pictures of this but take 3 inch wide material. Fold it over to make 1 1/2 inch wide material and sew the open side shut.  Turn it inside out and iron.  I sewed each edge again to get a finished looking piece of material.  Turn both ends in and sew those closed.   Set your sewing machine to  lesson the tension.  On my machine it is 6+ my machine is old so I am not sure what other machines settings are.  Sew a straight stitch down the middle and your machine will automatically gather and ruffle the material.  

Attach ruffle to the front of your hand towel (hoodie) and sew the two pieces together.  I placed the ruffle at the edge of the towel and sewed along the middle of the purple ruffle.  I wanted to make it look like one sewing line.  


 Attach hoodie (hand towel) to towel.  I found the middle of the towel and the middle of the hand towel and pinned them together.  Then I continued pinning along the right and left until the hand towel ran out. 


Sew together. 

 Your hoodie towel is done.


Enjoy!

Friday, March 22, 2013

Cakes and Sweets Anyone?

My darling sister has started her own Bakery!!  I love it.  She has a wonderful web site for all  her delicious treats.  Go on over and take a look, shellswirls.  You will not be disappointed.  Here are a few pictures form her tasty selection.  

Mini Rose Bouquet
DSC00154_3


Macaroons
DSC00203


Please be patient...

I have several wonderful post in the works. My camera battery died and it will not let me upload any of my photos. On top of it all we have been sick around this little house. This next week I will be post crazy...well I will get 2-3 post done. I'll give you a little hint....
*Painting kitchen counters to look like granite*
*Painting kitchen cupboards white*
*Simple bath towels for the kiddos*

*AND MORE SO STAY TUNED!!!*

Wednesday, March 13, 2013

Baby Girl Skirt

I have been out of town for the past couple of days and wanted to get this post up. I have sick kids, laundry and just catching up to do so I am posting the pictures and then linking you to a great blog for the tutorial. Click here for the steps!
What makes my skirt different? I added pom pom trim and cut out a little bird from different material and sewed it directly to the material.

Wednesday, March 6, 2013

Winner Winner Chicken Dinner!

I have to admit, I had some high expectations! Why not. Blogger tracks my audience and I have had over 1200 hits from ten Countries. Even though my actual followers is still very small, I know I have a lot of viewers. That is amazing to me. To make a long story short, we still have a winner.
Melanie is the lucky winner! Let me know what color you want. I will call or email you soon.
PS..I am not sure I liked using rafflecopter...any thoughts???

Tuesday, March 5, 2013

Hair Bow Window

Need a place to hold all your hair bows..look no further.
Take two ribbons decorate how you like and staple them on the back of an old but new fixed up window. I also grabbed some hooks from Ikea and nailed them on the side to keep all of her jewelry!