Saturday, April 27, 2013

Sewing A Picnic Blanket

Are you ready for some picnics??  Do you have the perfect blanket?  If not try this....
 
Have you ever had piles of old Levi's that have holes or stains?  Well, here is the solution.  Cut them up into any size you desire.  If  you cut them into a large square or rectangle the less sewing you will have to do.  I know sometime with kid pants small shapes are all you're going to get.  Either way the end result is wonderful for a picnic blanket. 
 
Sew all the pieces together just like a normal quilt.  Row by row and then sew all the rows together.  You can make it as big or as small as you like.  This one is on the smaller side.  I don't have a step by step tutorial because I got this quilt as a gift.  I made one prior to this blog and it is packed up (while we remodel our basement).   The one I made could fit on a queen size bed.  I love how big it is.


Once you sew all the pieces together you could be finished or add some felt to the back and quilt it.


The reason I love this quilt...well, you know when you go to sit for a picnic and the grass just isn't quite dry.  With other blankets, it will start to get wet and then you and the kids start to get wet.   The thickness of the material solves the problem.  I have never gotten wet while sitting on this blanket.  I love it!!
 
Happy Picnicking!!!!


Wednesday, April 17, 2013

Washi Tape


It has been an interesting week so far.  Our computer and camera both died on us!!  So sad and not so good for a blogger.  How do I take pictures and create post??  Well my cell phone is my current camera and I have great parents who let me borrow their lap top.  Sorry for the lack of post this week.
 
Now for the post...
 
I bought some washi tape several months ago from Pick Your Plum.  I didn't know what I would use it for.  There are some great ideas out there, but I was waiting to figure out what I wanted to do.  The opportunity came.  It was my week to teach our co-op preschool.  We made these books for the kids.


I wanted to make them a little more fancy.  Not just construction paper.  And then it came to me to use the washi tape.  It was so easy to use and added just a little fun to each book.  It also helped on the back where the pins holding the book together were moving all around.   


Tuesday, April 9, 2013

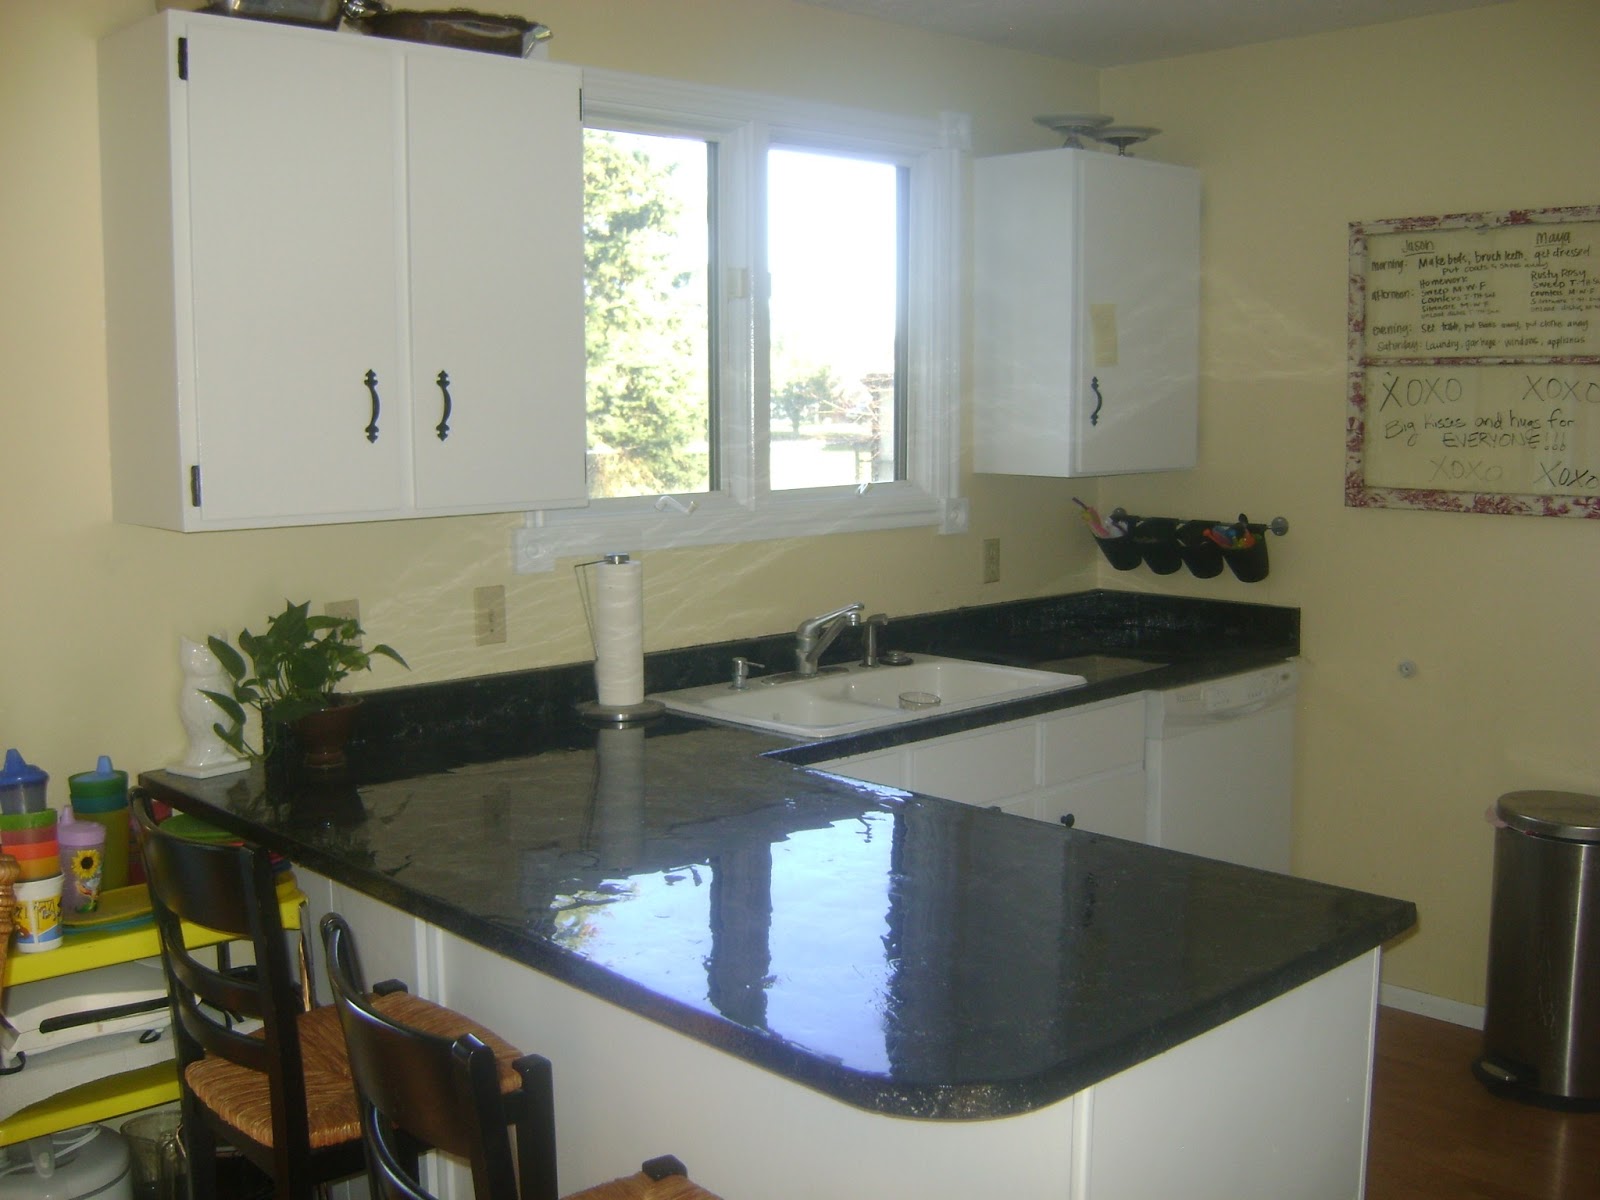
DIY Kitchen Makeover - including faux granite countertops!

I think I put off upgrading my kitchen because I only had about a $300 budget.  How can you make a 35 year old kitchen look decent with that little of money?  Well I took the plunge and decided that it was going to have to work.  And....I love the way it turned out.  I still need to upgrade my faucet, which will be coming in the next couple of weeks.  

The After


The Before (I forgot to take pictures until I was taping)


A close up of the old laminate counter top.


I first started with priming my counter top.  I did this with white (picture not shown) and then waited the appropriate time for the second coat.  This time I added black to it, to make it the grey color you see above.


Then waited again, and then painted it with my black oil paint. (I will give you the name of all the paint I used below, so hold tight).


I let the black paint dry overnight and then sponged a metallic silver paint (I bought mine at the craft store, but you can buy it at any home improvement store).  At this point I was a bit nervous, and the thought ran through my mind that this will cost more because we will have to get brand new counter tops!  Don't get to worried it works out, but don't feel alarmed if you have the same thought.


After the metallic silver dried, I sponged over it with the black.  It was looking better, but still not what I wanted.  


So I had some chocolate brown paint and once the black was dry, I sponged over it with my brown.   


One more time sponging with the black paint.  


Now the varnish. I waited one day before I put the varnish on.   Oh, don't forget the sparkle.  Who said that glitter is only for kids?  I found some glitter in the paint department at Lowe's.  I sprinkled a little glitter on the dry counter top to make it look like granite, then put the varnish on.


The Products I used:

  Before I painted I cleaned everything very well.  I also bought a deglosser and used that on everything (so I wouldn't have to sand).  I bought mine at Lowe's in the paint department.

Zinsser Gallon Interior Oil Primer

For the primer I used this, Zinsser cover stain.  This is the first time I have used this and it was wonderful.   All of this paint was oil based, so it smells.  Try to paint when you can open the windows for a couple of days during the process.  I used two coats of primer on the counter and cabinets. 


For the main color on the counter tops I used the Flat Black Rust-Oleum paint.  


729723_1

For the shine on the countertops I ended up buying 3 of the 32 oz. EnvirTex Lite product.  I bought it at Hobby Lobby and used my 40% off coupon to get all three. 
 It may take a couple of trips but worth the cost. 
  Follow the directions very well.  Tape everything off and have your blow torch ready (I already had one for when I make crème brule).  I think you can buy one for around $10.   I used two boxes of EnviroTex Lite for my main counter.  I have to admit it was a bit stressful.  But make sure you have enough.  Too little and it will cause some uneven spots.   Then let it dry for the full 72 hours before you use the counters.  


Next the Cabinets!!!


My daughter is as much a craft fanatic as I am and has to help with everything.  So I let her do that wall. 


I took all the hardware and doors off (I very specifically marked them so I could put them back in the same spot) and then painted the cabinet doors in my garage (a little less smelly).
Once again I primed the cabinets with the Zinsser primer.  Let it dry and then put the second coat of primer on.  For the paint, I used Gloss White Rust-Oleum paint for the main coat on my cabinets.  They only needed one coat.  


The hardware I screwed into an old box so that I could have it up right.  I used as much of the old stuff as I could, but years back I had replaced some door knobs and not all of it.  I found some wood knobs at Home Depot for less than $1 each.  I spray painted them all. 


I used Brushed Metallic Satin Oil Rubbed Bronze.  Once again I found this at Hobby Lobby.  I had also bought a spray paint hand gun for a couple of dollars at Walmart...worth every penny!  It took a couple of days for the hardware to be done and I sprayed several coats on. 


The final coat for the hardware was Krylon Clear Satin Polyurethane.  I wanted a little extra strength so that the oil rubbed bronze wouldn't rub off.  So far so good!


And the finished kitchen!!!


The dollar wooden knobs.


The hinges that I spray painted also.


My new kitchen.  


After I was done, I told my husband I needed to paint the walls because now I don't like the color with the new cabinets and counter.   It never ends!!!

Please leave a comment if you have any questions or if I wasn't clear on any of the steps!


Thursday, April 4, 2013

Chocolate Chip Cookies

AHHHH.. Delicious Chocolate Chip Cookies.  This is my favorite recipe!  It's even healthy (well at least I think it is).  Now you have no excuse to make them.  

The Cookie

1 cup butter and 1 cup coconut oil (or just use all coconut oil)
2 cups sugar
2 cups brown sugar
4 eggs
2 teaspoons vanilla
4 cups whole wheat flour
1 tsp. salt
2 tsp. baking soda
2 tsp. baking powder
5 cups old-fashioned oats, ground to flour in a food processor or blender
1 package white chocolate chips
1 package dark chocolate chips 
1 package milk chocolate chips

Cream butter/coconut oil and sugars.  Add eggs and vanilla and mix.  Then add flour, salt, baking powder, baking soda and then the ground oats.  Last and most important in my book, the chocolate chips!!

I use a cookie scoop and place them on a lightly greased cookie sheet.  Bake for 8-10 minutes at 375 degrees.

This makes about 6 dozen cookies. 


I only bake about half.  I then line a cookie sheet with wax paper and place as many of the scooped cookie dough onto one cookie sheet and place in the freezer for about 1/2 hour.  Once hard enough to move, I place about 12 into a small zip lock bag and then stuff those baggies into a larger zip lock bag.   I right what it is the date and the baking instructions.  It is perfect when you need a quick snack or dessert for someone.


Now, the what not to do


I wanted little chippers like the ones you find at Paradise Bakery.  I should of just did little scoops onto a cookie sheet.  I decided that it would be cool to use my mini cup cake pan.  I greased it well and placed the cookies in.  Well they cooked fine, the just didn't come out of the pan so well.   You win some and you loose some!

Enjoy!

Wednesday, April 3, 2013

Paper Garland

Want a little splash of color for a party or get together.  Well I have the perfect simple solution.  PAPER GARLAND.   It takes minutes (really) to make.   I made this with extra scrap paper that had patterns on it. 


Materials:
Paper
Paper Cutter
Sewing machine

How to Make:
Take your paper cut it into 7 inch long strips and 1 inch wide.  Bend in the middle and put them in any pattern or no pattern at all!  

Next Sew.  Just a reminder that this will dull your sewing needle so you may want to have a needle put aside for paper sewing. Start with your first paper and then as you get done slowly add the next paper to add a little space in between them. 


I made another banner with scraps of paper that I used my Cuttlebug to imprint a flower design.  Now these were different lengths and widths.  It still looked great. Or.....


One with just solid colors!


I love these.  So simple and cute.  I think I will try some that aren't so long next time!


Have Fun and Enjoy!

Thursday, March 28, 2013

Paper Flower Wreath

My New Spring Wreath!

Material you need:

1. Styrofoam wreath
 2. Scrap material to wrap wreath (optional)
3. Old magazine (I used 3-4 small Magazines)
4. Sizzors
5. Glue gun or Craft Glue
6. Spray paint
7. Ribbon of some sort to hang with


I wanted a new spring wreath.  What I thought would take an hour surprised me to take several more.  But I REALLY like the result. 


I wrapped the wreath with scrap material. 
 I like gluing onto the material rather then straight onto the styrofoam.


I then ripped out the pages of the magazine and cut them in half and then in half again. My magazine was a small one.  


I bunched them in sets if 2, 3,4, etc.   I didn't count I just grouped them and cut.  The more pages together, the larger your flower can become.  

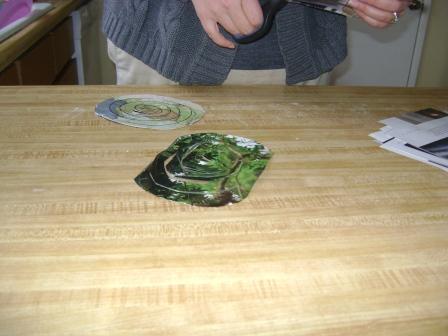
 I cut them into oval/circle shapes.   For better pictures I drew the  circle on the papers.  I didn't do this on all of my circles.  Then the cutting began again.  This process happened several times, as I realized I would need more magazines to complete my wreath. 


My circles were not cut perfectly, they had jagged edges and were not all that pretty, but I like the way it turned out.  Some flowers were larger then others and all were different. 


I started wrapping with the outer edge.  I tried it both ways and I preferred working from the outside in. 


Start wrapping tightly.  When I got near the end I would rip off the last little bit if it didn't fit well.  


You can glue them on the wreath or get a little pile and then glue.  When you let go they will not be as tight.  I did both.  Glue the tight ones right on and put them down and let them grow a bit.  


Once your flowers are all glued, you can spray paint it.   I took my wreath outside and spray painted it several times, giving it time in between to dry.   I bought my spray paint at Walmart the cheap stuff for $1.  

Now if you have a door that faces East and it gets REALLY hot between the screen and door, don't use a glue gun.  The heat will melt the glue!!!  Trust me not fun to see parts of your wreath on the ground and glue that melted and then hardened dripped all over your door!  This might become a Christmas wreath!

Have fun and Enjoy!


Tuesday, March 26, 2013

Kids Hoodie Towel Tutioral

My Kids LOVE their Hoodie Towels!!
They got theirs as baby shower gifts and have used them for years. 
My niece is having a girl and I thought I would make her baby one.

What you need: 
1 regular towel
1 hand towel
Material for ruffle edge (My kids have ribbon sewn 1/4 of they way up on the hand towel) . I decided I wanted a ruffle edge. I bought my towels at Target and had the purple material on hand. 


I actually had it all sewn before I figured out that I needed to cut the hand towel down.  Oops.  I should have taken pictures, but I was a bit frustrated and the baby shower was in 1 hour.  To say the least I was in a bit of a hurry.
Cut the hand towel to equal 12 inches on one side and 8 on the other.  I then zig zaged the edge or you could serge it.  If you want to hem maybe leave a little more material. 

Sew the 12 in side together. 

Do you see the hoodie taking shape?

I took my purple material.  I made it about 1 1/2 inch wide .  It was about 16 inches long.  If you don't want it very ruffly then shorten your length. 
I don't have pictures of this but take 3 inch wide material. Fold it over to make 1 1/2 inch wide material and sew the open side shut.  Turn it inside out and iron.  I sewed each edge again to get a finished looking piece of material.  Turn both ends in and sew those closed.   Set your sewing machine to  lesson the tension.  On my machine it is 6+ my machine is old so I am not sure what other machines settings are.  Sew a straight stitch down the middle and your machine will automatically gather and ruffle the material.  

Attach ruffle to the front of your hand towel (hoodie) and sew the two pieces together.  I placed the ruffle at the edge of the towel and sewed along the middle of the purple ruffle.  I wanted to make it look like one sewing line.  


 Attach hoodie (hand towel) to towel.  I found the middle of the towel and the middle of the hand towel and pinned them together.  Then I continued pinning along the right and left until the hand towel ran out. 


Sew together. 

 Your hoodie towel is done.


Enjoy!